
Adding an image caption Google Docs setup doesn’t have to break your formatting or ruin your document workflow.
If you are building an aesthetic digital portfolio, submitting an academic paper, or designing a high-impact content brief, clean image labels are essential for organization.
While Google Docs doesn’t currently offer a single-click “add caption” button, mastering the quickest workarounds keeps your text and visuals perfectly aligned.
From the seamless Drawing Tool method to clean borderless tables, organizing your media assets properly boosts both professional presentation and readability.
Your document design reflects your brand’s attention to detail, and a flawless layout ensures your readers stay engaged from the first page to the last.
Stop fighting with shifted text blocks discover the easiest, fastest, and most reliable ways to format your visuals effortlessly today.
How to Add Image Caption Google Docs Using Drawing Tool
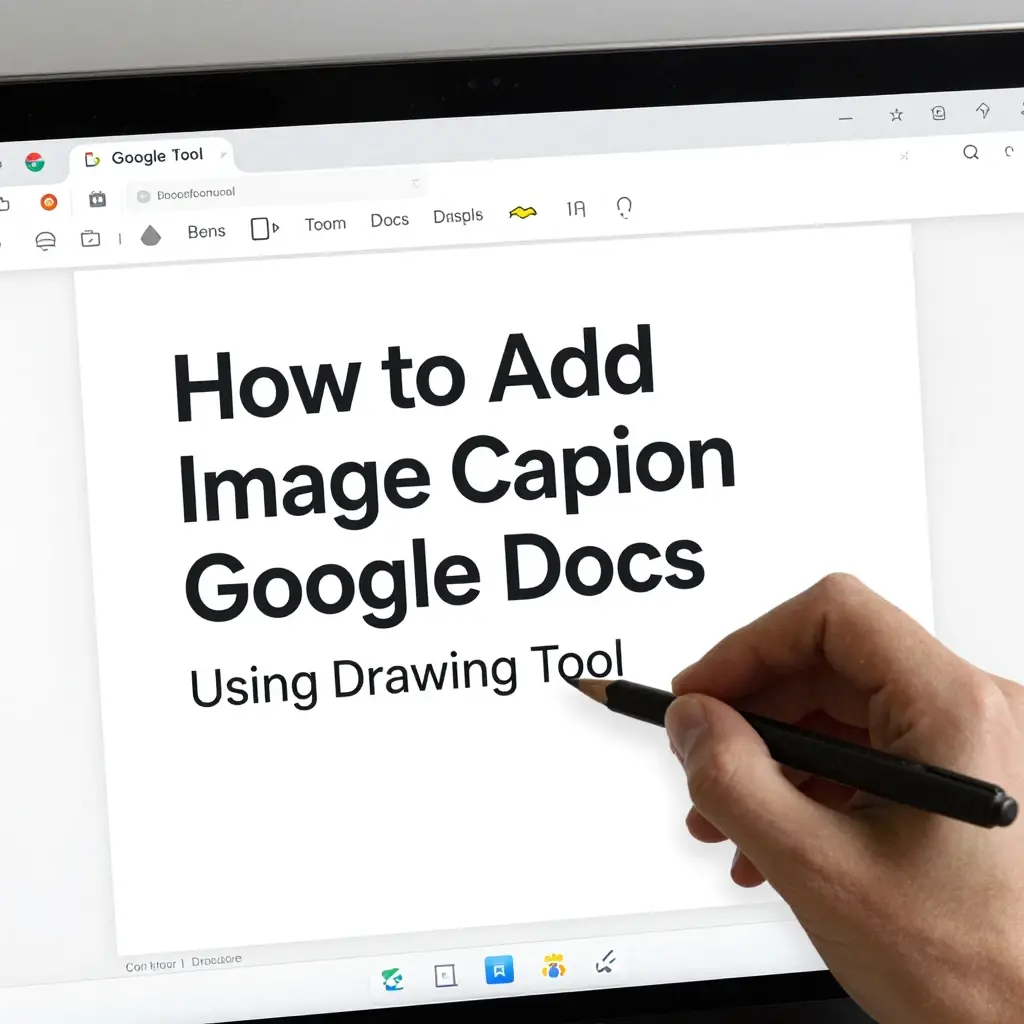
- Open your document and place your cursor where you want the visual assets 📍
- Click on the top menu bar and select Insert > Drawing > New 🛠️
- Click the Image icon inside the drawing window to upload your file 🖼️
- Choose a file from your computer, Google Drive, or a web URL 🌐
- Select the Text Box tool from the top toolbar of the drawing window 🔤
- Drag and draw the text box directly underneath your uploaded image ✏️
- Type your desired description, source citation, or label into the box 🖋️
- Format the font style, size, and text alignment to match your brand 🎨
- Adjust the width of the text box so it perfectly matches the image edges 📐
- Click the blue Save and Close button in the top right corner 💾
- View your newly bundled image and text asset right inside your document 👀
- Click on the image to select your preferred inline wrap text settings 🔄
- Double-click the graphic anytime you need to edit the description text 📝
- Drag the corners of the drawing canvas to resize the entire asset proportionally 📏
- Keep your text and visual locked together no matter where you move them 🔒
- Use this method to prevent your text from jumping to the next page 🚀
- Add custom background colors to the drawing canvas for a modern pop 🎨
- Draw clean accent borders around your description box for better style 🗂️
- Center align the graphic to give your article a highly professional look 🏛️
- Save time by duplicating the drawing canvas for future graphic assets 👥
- Master this approach for seamless, frustration-free layout designing every single time ✨
Formatting Captions with the Table Method Workaround
- Click Insert on your top menu bar and hover over the Table option 📊
- Select a 1×2 grid size creating a single column with two vertical cells 🗚
- Place your cursor inside the top cell of the newly created table 📍
- Drag and drop your image directly into that top section of the grid 🖼️
- Move your cursor down to the second cell right underneath the visual 🖱️
- Type out your explanatory text, photo credit, or figure number neatly 📝
- Highlight the entire table to open up the formatting customization settings 🎨
- Locate the Border Color tool in the top formatting shortcut toolbar 🖌️
- Change the border color to white or choose the 0pt width option ⚪
- Watch the outer grid lines vanish into an invisible placeholder layout 🪄
- Adjust the cell padding settings to bring the text closer to the graphic 📏
- Center align the text inside the lower cell for balanced document design ⚖️
- Resize the graphic and notice how the lower description auto-adjusts seamlessly 🔄
- Use this strategy to easily manage multiple images in a vertical stack 📚
- Ensure your layout looks completely native without using complex drawing tools 🛠️
- Prevent annoying page break separations between your visuals and descriptions 🛑
- Add a soft background tint to the lower cell for a sleek callout block ⬜
- Keep your document layout 100% stable during export to PDF formats 📄
- Perfect for organizing step-by-step screenshots inside technical training manuals 🛠️
- Type long paragraphs without worrying about throwing off horizontal margins 📈
- Enjoy a clean, automated, and lightning-fast solution for heavy text documents 🚀
Best Practices for Academic and Professional Style Guides
- Always use standard APA, MLA, or Chicago styling for formal reports 📚
- Label your media assets sequentially starting with Figure 1 throughout the piece 🔢
- Keep descriptions brief, highly informative, and strictly relevant to the text 🎯
- Place your citations immediately following the descriptive phrase or title 🖋️
- Use a slightly smaller font size than your main body text for contrast 📏
- Italicize the label intro like Figure 1. to establish a clear visual hierarchy 🏛️
- Maintain consistent line spacing between the graphic asset and its description ⚖️
- Avoid using overly bright or distracting font colors for formal document layouts 🖤
- Ensure all source URLs are hyperlinked correctly for digital readers to click 🌐
- Keep your alignment consistent by center-aligning both image and text elements 📐
- Write clear, concise descriptive text that adds value to the surrounding content 🧠
- Never repeat the exact same sentence that is already in your main paragraph 🛑
- Group related images into labeled sub-sections for much cleaner reading flows 🗂️
- Check that your descriptive formatting remains uniform across all document pages 🔲
- Use bold text tags for the asset number to grab attention quickly ⚡
- Keep your citations accurate to avoid accidental plagiarism or copyright issues 🛡️
- Use footnotes if your source attribution requires a lengthy legal disclaimer 📜
- Align your styling with the specific requirements of your publisher or school 🏢
- Test how your formatting translates when sharing the live link digitally 🌐
- Use descriptive language that aids screen readers for better digital accessibility ♿
- Create an index table at the very beginning for documents with 10+ graphics 🗂️
Step-by-Step Inline Text Wrap Formatting Techniques
- Click once directly on your document image to reveal the layout menu 🖼️
- Look at the floating toolbar that appears directly underneath the asset 🛠️
- Select the Wrap Text option to allow flexible placement around your sentences 🔄
- Move your cursor directly to the line right below the graphic asset 📍
- Type your descriptive text line manually without creating massive white spaces ⌨️
- Use Shift + Enter to create a tight line break for the label text ↩️
- Style the text using italics or a muted color like dark gray 🎨
- Adjust the margin settings around the image to create a perfect buffer gap 📏
- Choose a 1/8 inch margin for the most aesthetically pleasing text spacing 📐
- Drag the image around the screen and notice how the sentences wrap cleanly 🌊
- Keep your paragraph lines tight so the description doesn’t float away solo 🎈
- Use the Break Text option if you want sentences strictly above and below 🛑
- Avoid using the In Line With Text setting for complex multi-layered layouts ❌
- Test how your text behaves when adding new paragraphs higher up the page 📈
- Keep your descriptive lines short to prevent them from bleeding into columns ✂️
- Lock the graphic to a fixed position on the page for absolute layout control 🔒
- Use this style for magazine-style editorial layouts and highly visual blogs 📰
- Check for awkward single-word line wraps on the sides of your image 🛑
- Keep your text flow natural and easy for the human eye to track scanning down 👀
- Combine inline wrapping with small icons for an ultra-modern corporate vibe 🚀
- Master these built-in alignment options to unlock total design freedom effortlessly ⚡
Creative Layouts for Portfolios and Digital Lookbooks

- Play with asymmetrical drawing alignments to give your portfolio an edgy vibe 🎨
- Use sleek sans-serif fonts like Montserrat or Inter for a modern look 🆒
- Pair your images with minimal, clean numbering styles like “01 // Studio Session” 📸
- Add a thin, elegant border around your drawing assets to frame them beautifully 🖼️
- Layer light pastel colored shapes behind your text boxes for depth 🌈
- Keep descriptions ultra-short, focusing heavily on dates and project titles 📅
- Use light gray text for your sub-captions to achieve a luxury editorial look 💎
- Create a two-column invisible table to place images and descriptions side-by-side 👥
- Experiment with vertical text alignments inside the drawing tool canvas 📐
- Match your font selections perfectly with your personal branding style guide 📖
- Add subtle drop shadows to your images using the built-in format options 👤
- Keep your white space generous to let your visual layout breathe beautifully 🍃
- Mix horizontal landscape shots with tightly labeled vertical portrait frames 🌌
- Use bold accent colors for keywords inside your descriptions for high contrast 💥
- Build reusable layout templates to speed up your digital client lookbooks 📋
- Integrate your social handles directly into the footer of your image graphics 📱
- Keep the design focus on your imagery by using clean, unobtrusive labels 🔍
- Use thin divider lines to separate multiple design assets on a single page 📏
- Create interactive elements by linking descriptions to external project sites 🔗
- Elevate your pitch decks with clean presentation-style graphic captioning 🎤
- Show off your creative eye by turning standard docs into stunning design pieces ✨
Troubleshooting Common Alignment and Page Break Glitch Fixes
- Fix images jumping to unexpected pages by changing text wrapping to Wrap Text 🚀
- Solve description text separating from graphics by bundling them inside Drawing 🔒
- Repair clipped text boxes by opening the drawing tool and extending canvas bounds 📐
- Fix disappearing table borders by checking your table properties border width settings 🛠️
- Correct awkward spacing by adjusting the image margin parameters down to 0mm 📏
- Resolve font style resets by updating your document’s default text styles 🎨
- Fix distorted or blurry images by resizing only from the diagonal corner points 🖼️
- Clear up overlapping text issues by selecting the Move with Text setting option 🔄
- Fix weird mobile layouts by keeping your invisible tables down to one column 📱
- Erase unwanted background highlights by clearing text formatting tools completely 🧼
- Fix broken hyperlinks by re-pasting the clean URL into the text edit bar 🔗
- Eliminate massive white gaps by deleting accidental empty paragraph spacing lines ❌
- Fix sluggish document loading speeds by compressing giant image files beforehand ⚡
- Resolve text formatting mismatches by using the Paste Without Formatting command 📋
- Stop text from wrapping into tiny vertical columns by widening your image width 📏
- Fix image formatting losses during Microsoft Word exports by using table workarounds 👥
- Correct skewed alignments by resetting the image crop settings back to original ✂️
- Fix hidden caption text by checking line spacing and paragraph spacing fields 🔍
- Solve multi-page table break errors by unchecking the allow row to split box 🛑
- Eliminate alignment headaches by sticking to the foolproof drawing canvas option 🎯
- Keep your cool and use these quick diagnostics to fix any layout glitch fast 🛠️
Maximizing Document Readability and User Engagement
- Use clear, bold labeling to guide readers through heavy technical steps 🧠
- Break up endless walls of text by inserting well-labeled graphic breaks 🖼️
- Keep your vocabulary simple, direct, and focused on explaining the visual asset 🎯
- Match the tone of your captions with the overall voice of your article 🗣️
- Use power words inside your labels to spark curiosity and increase dwell time ⚡
- Ensure high visual contrast between text coloring and your document background 🌓
- Place key information first in the description string for fast scannability 🔍
- Use bullet points under your images if you need to explain multiple data points 📊
- Keep line lengths comfortable so readers don’t experience visual fatigue 👁️
- Add a call-to-action link directly beneath your product showcase images 🛍️
- Keep your styling uniform so the reader effortlessly learns your layout pattern 📁
- Avoid using complex jargon inside casual or introductory document graphics 🛑
- Use questions in your captions to challenge readers and boost mental engagement 🧠
- Ensure your text sizes look perfectly balanced next to the scaled image size 📐
- Highlight surprising statistics or data takeaways right underneath your charts 📈
- Use icons alongside text labels to create an intuitive reading experience 🗺️
- Keep your formatting clean to ensure your content looks great on all screens 📱
- Tell a cohesive story that links your paragraphs directly to your graphics 📖
- Use emotional triggers in lifestyle imagery labels to build a deeper connection ❤️
- Test your document readability by scanning through it in under thirty seconds 👀
- Prioritize clean design to give your readers a premium content experience ✨
Advanced Drawing Tool Tricks for Custom Labels
- Layer multiple text boxes inside one canvas to create titles and subtitles 🗂️
- Use the shape tool to create clean background cards for your text labels 🎴
- Adjust shape transparency settings to create stunning modern glassmorphism looks 💎
- Add custom brand colors using hex codes directly inside the canvas color picker 🎨
- Group your image and text elements inside drawing so they scale as one asset 🤝
- Use the alignment guide lines to snap text boxes perfectly to image centers 🎯
- Insert custom arrows to point out specific details inside your screenshots 🏹
- Apply sleek gradients to your text card backgrounds for a premium feel 🌈
- Rotate text boxes vertically to create striking side-margin graphic labels 📐
- Use custom fonts not found in your standard document toolbar options 🔤
- Control padding sizes inside your shapes to keep text perfectly balanced 📏
- Add clean drop shadows to shapes for a subtle 3D floating effect ☁️
- Create custom collages by layering multiple cropped images inside one drawing 🖼️
- Use the curve line tool to draw organic custom framing elements effortlessly 〰️
- Save your favorite drawing configurations to copy and paste across files 📋
- Keep your canvas organized by utilizing the bring to front layout commands 🔝
- Adjust line weights on borders to create a polished, hand-crafted design look ✏️
- Use tint overlays on images to make white description text pop beautifully 💡
- Build professional infographics by combining charts, shapes, and text boxes 📊
- Lock your design elements down to prevent accidental shifts while typing lock 🔒
- Push the limits of Google Docs by mastering these secret drawing features 🚀
Utilizing Invisible Tables for Multi-Image Grid Systems
- Insert a 2×2 table to create a flawless side-by-side dual image layout grid 📊
- Place images in the top row cells and captions directly in the bottom cells 👇
- Adjust column widths evenly to guarantee perfectly symmetrical image displays 📐
- Turn off table borders completely to leave a clean, floating grid system 🌬️
- Copy and paste your grid setup to quickly build consistent product catalogs 🛍️
- Keep related comparison graphics locked side-by-side on a single page 🔒
- Prevent individual graphics from sliding out of alignment on different screens 📱
- Control the vertical spacing between the image row and description row manually 📏
- Set specific cell margins to create beautiful white alleys between your visuals 🏞️
- Use a 3×2 table grid for showcasing multi-angle product feature shots 📸
- Center all cell contents to achieve a balanced, high-end look instantly ⚖|
- Keep text blocks constrained so descriptions never overlap neighboring graphics 🚫
- Build clean mood boards by filling grids with inspiring aesthetic textures 🎨
- Ensure effortless responsiveness when converting your work into web pages 🌐
- Add a soft, unifying background color across the entire hidden table structure 🧱
- Keep your editing process smooth by toggling grid lines back on when modifying 🛠️
- Avoid formatting headaches by letting table cells handle the hard math math 🧮
- Create editorial-style lookbooks that mimic expensive design software layouts 📰
- Streamline your documentation workflow using this ultimate grid shortcut ⚡
- Impress your team with clean, perfectly structured multi-image documentation 💼
- Trust invisible tables to keep your most complex document layouts perfectly stable 💎
How to Format Image Captions for Legal and Technical Docs
- State the precise intellectual property or copyright ownership data clearly 📜
- Use strict numerical catalog codes like “Exhibit B-2” for formal legal entries 🗂️
- Include exact timestamps and geographical metadata for evidentiary images ⏰
- Keep descriptions completely objective, factual, and free of bias or fluff ⚖️
- Reference specific paragraph sections where the visual asset is discussed 📝
- Use high-contrast black text on a clean white background for total legibility 🖤
- Format source attributions precisely using target industry standard citations 🖋️
- Place confidential or security classification stamps clearly above the graphic 🔒
- Keep text alignments strictly left-justified to match formal court filing styles 🏛️
- Link digital assets directly to verified cloud storage folders for authentication 🔗
- Add digital signature verification tags directly into your text fields 🖊️
- Use standard, highly readable system fonts like Times New Roman or Arial 🔤
- Ensure patent illustration labels correspond perfectly with descriptive text 🛠️
- Keep file names and document caption titles perfectly synced for auditing 📂
- Include clear disclaimers if images have been digitally altered or cropped 🚫
- Place multi-page technical drawings inside structured, labeled layout borders 🗺️
- State the scale parameters clearly for architectural blueprints or map assets 📏
- Use footnotes to list comprehensive lists of patent contributors and sources 👥
- Avoid using emojis or casual slang phrases in formal technical records ❌
- Ensure layout stability by locking graphics using table system workarounds 📊
- Maintain total compliance and professionalism with flawless technical formatting 💯
Creative Ways to Style Callouts and Image Labels
- Use bold blockquote formatting styles to make your image text pop visually 💬
- Add a colorful left-border accent line next to your description text card 🌈
- Frame your graphic captions inside a subtle, rounded pill-shaped box 💊
- Use an uppercase styling for titles followed by sentence case subtitles 🔠
- Insert a small, elegant decorative icon before your figure number labels ⚜️
- Create a vintage look by using classic typewriter fonts like Courier New ⌨️
- Use soft, muted Earth tones for text colors to fit bohemian branding styles 🌿
- Pair sleek minimalist art with tiny, clean bottom-right aligned labels 📐
- Wrap your descriptions inside a modern hanging indent paragraph layout 📋
- Use dark mode styling by placing light text onto deep dark canvas blocks 🌙
- Add motivational or inspirational callout text boxes directly over images 🏹
- Design a film-strip aesthetic by chaining images and labels sequentially 🎞️
- Keep formatting playful for youth brands by using safe comic-style fonts 🎈
- Add custom handwritten-style fonts for an authentic, personal diary feel ✍️
- Frame your text cards with clean dashed or dotted accent line borders 🧵
- Match your label background colors to the dominant hue inside the photo 🎨
- Create magazine pull-quotes that double as stylish graphic descriptions 📰
- Use stark geometric layouts to highlight sharp architectural media assets 🏛️
- Keep your styling adventurous by experimenting with unique accent marks ⚡
- Blend fun and functionality by building highly engaging visual callouts 🚀
- Discover your unique document aesthetic by trying new design combinations ✨
Optimizing Image Metadata and Alt Text for Accessibility
- Right-click any document graphic and select Alt Text to boost SEO ranking 📈
- Write a detailed, keyword-rich title for your media file inside the settings 📝
- Describe the exact contents of the visual asset clearly for screen readers 🗣️
- Include relevant semantic keywords naturally without stuffing the description text 🌾
- Keep your alt text under 120 characters for optimal screen reader efficiency ⏱️
- Avoid starting descriptions with repetitive phrases like “This is an image of” 🚫
- Focus on describing the core actions, objects, and colors in the visual scene 🎨
- Add target search phrases to your alt text to help search engines index files 🔍
- Keep your on-screen captions and behind-the-scenes alt text distinct and unique 👥
- Ensure all charts and graphs have data summaries embedded in their alt data 📊
- Update metadata properties before uploading images into your Google Drive 💾
- Use alt text to explain the context of complex diagrams to disabled readers 🧠
- Keep accessibility at the forefront of your digital content creation process ♿
- Test how screen reading software processes your document before finalizing 🎧
- Use descriptive alt text for decorative elements only if they add true value 🛡️
- Check that all featured graphics contain accurate, search-optimized file names 📂
- Sync your on-screen caption strategy with your hidden accessibility metadata 🎛️
- Improve user experience scores across all web publishing platforms effortlessly 🌐
- Make your articles fully compliant with global digital accessibility laws 🌍
- Watch your content rank faster on Google by checking all optimization boxes 🚀
- Build a more inclusive digital space with smart, strategic alt text management 💎
Creating a Consistent Visual Identity Across Team Docs
- Design a master template file containing pre-formatted image layout modules 📋
- Share the master styling guide link with all content team members 🌐
- Restrict editing permissions on layout designs to keep branding uniform 🔒
- Use custom document themes to lock in approved brand color palettes 🎨
- Set strict rules for font families, text sizes, and label padding limits 📐
- Teach team members how to use invisible tables for multi-image grids 📊
- Create a centralized asset folder with optimized, high-res corporate visuals 📁
- Standardize sequential numbering systems like “Section 3 // Graphic C” 🔢
- Audit shared team documents weekly to catch and fix formatting errors fast 🔍
- Use the built-in comment system to suggest layout fixes to writers 💬
- Update style guides quarterly to include fresh design trends and features 🔄
- Keep a library of pre-made drawing tool elements ready for copy-pasting 🗃️
- Hold quick training syncs to show your team how to fix page break glitches ⏱️
- Celebrate team members who deliver perfectly formatted document layouts 🏆
- Ensure international branch teams use consistent localized style guide versions 🌍
- Keep customer-facing documents looking pristine by enforcement of style rules 🏢
- Build a reputable, polished brand image with ultra-consistent documentation 💎
- Reduce production friction by giving writers clear formatting instructions 🏁
- Use automated extensions to quickly check document formatting compliance ⚙️
- Keep your visual assets organized, professional, and completely on-brand 🚀
- Elevate your entire brand identity through the power of structured document design ✨
Quick Shortcuts and Hacks for Fast Workflow Editing
- Use Ctrl + Alt + C to copy text formatting from an existing caption 📋
- Press Ctrl + Alt + V to instantly paste that style onto your next text line ⚡
- Double-click any image asset to quickly crop out unwanted outer edges ✂️
- Hold down the Shift key while resizing images to lock original aspect ratios 📐
- Use the shortcut Ctrl + Enter to instantly create a clean new page break 📄
- Access the Drawing tool instantly by using alt menu search shortcuts 🔍
- Copy an entire pre-formatted invisible table to reuse it in seconds 👥
- Use the alignment shortcuts Ctrl + Shift + E to center align elements fast ⚖️
- Clear messy formatting instantly using the clear formatting button tool 🧼
- Drag and drop files directly from your desktop into table cells effortlessly 🖥️
- Use text replacement shortcuts to auto-type long repeated legal labels ⌨️
- Toggle gridlines on and off using quick table property sidebar menus 🛠️
- Press Ctrl + Z to instantly undo an accidental layout shift or image stretch ↩️
- Keep your favorite image styling tools pinned to your quick access bar 📌
- Use extensions to bulk-download all document images with one single click 📥
- Hold Alt while dragging drawing lines to override snap-to-grid behaviors 📐
- Bookmark your master layout templates in your browser for instant access 🌐
- Memorize basic keyboard shortcuts to slash your article design times in half ⏱️
- Keep your workspace clean by closing unused sidebars and menu systems 🧹
- Work smarter, not harder, by utilizing hidden built-in automation features 🚀
- Supercharge your document production speeds with these epic productivity hacks ✨
Elevating Casual Blog Outlines into Publishing-Ready Content
- Transform messy brain dumps into beautifully structured editorial layouts 📰
- Place catchy, value-packed image descriptions beneath every single visual 🎯
- Ensure your text flows logically around graphics to maximize reader retention 🧠
- Use power words inside your visual labels to hook casual scanners quickly 🎣
- Align your image choices perfectly with your article’s primary headings 🗂️
- Add click-to-tweet quotes inside your caption cards for extra viral reach 🐦
- Ensure all data graphics link back to the primary source material files 📊
- Use high-quality, high-resolution lifestyle images that match your theme 📸
- Avoid generic stock imagery by using customized, brand-aligned elements 🎨
- Clean up your document structure before exporting to WordPress backends 💻
- Keep your image styling clean to reduce bounce rates on live web pages 📉
- Use descriptive phrasing that leaves readers wanting to explore your site more 🌐
- Check that your image layouts look stunning when translated to mobile viewports 📱
- Build deep trust with your audience by delivering crisp, clean presentations 🤝
- Turn standard documentation into an enjoyable, visually rich reading journey 🗺️
- Optimize your live display setups by practicing layout styles inside docs first 🛠️
- Stay ahead of the competition by delivering beautifully polished content pieces 🏆
- Keep your publishing pipeline moving smoothly with production-ready files 🏁
- Watch your digital authority grow as you post cleaner, better articles 🌟
- Elevate your writing game by mastering the art of visual storytelling today 🚀
- Deliver elite content experiences that keep your audience coming back for more ✨
Voice Search Queries and Conversational Captioning Strategies
- Write captions that answer direct “how do I…” long-tail search phrases 🗣️
- Use natural, conversational phrasing inside your graphic text blocks 💬
- Optimize for voice search queries by including local landmarks or terms 🗺️
- Frame your image labels as direct answers to common user search intents 🎯
- Use conversational Gen Z terms naturally to capture younger audience traffic ⚡
- Keep descriptions sounding like a helpful peer explaining a concept aloud 👥
- Avoid stiff, robotic text lines inside your creative visual explanations 🤖
- Structure your descriptions around question-and-answer formats for high relevance ❓
- Read your text out loud to ensure it flows smoothly and sounds natural 📢
- Capitalize on the rising trend of audio-assisted digital reading habits 🎧
- Include common spoken synonyms for your primary document focus keywords 🔤
- Keep descriptions clear enough to be easily understood without visual context 👁️
- Match your descriptive flow to the casual tone of popular podcast series 🎙️
- Use clear emotional triggers that resonate deeply when spoken out loud ❤️
- Optimize your text modules for modern AI-powered answer search engines 🤖
- Capture long-tail conversational traffic by answering niche user problems 🛠️
- Keep your styling modern, voice-friendly, and completely future-proof 🚀
- Stay ahead of the digital curve by optimizing for spoken search behaviors 📈
- Craft highly relatable text snippets that fit perfectly into voice assistant answers 📱
- Connect authentically with your readers by writing exactly how you speak ✨
- Secure top tier ranking scores with voice-optimized content strategies 🏆
Integrating Image Captions into E-Commerce Product Layouts
- Place crisp, high-converting copy directly under your product showcase photos 🛍️
- List key feature bullets and material specs inside your text cards 📊
- Add transparent pricing data and direct purchasing call-to-action links 💰
- Use urgency triggers like “Limited Edition” inside your product labels ⏳
- Display accurate size charts right underneath your apparel display assets 📐
- Showcase customer testimonial quotes as custom image descriptions ⭐
- Keep layout structures uniform across your entire digital digital catalog 🗂️
- Link product images directly to your live checkout shopping cart fields 🛒
- Use high-contrast font combinations to emphasize discount percentages 💥
- Highlight product use-case scenarios inside your visual text cards 🎬
- Keep formatting sleek to match the aesthetics of luxury Shopify brands 💎
- Use invisible table grids to show off multiple product angles side-by-side 📸
- Ensure product color variations are explicitly labeled in the text line 🎨
- Include warranty and return policy snippets inside your technical cards 📜
- Boost buyer confidence by providing hyper-detailed graphic explanations 🤝
- Turn basic document proposals into highly effective sales generation pages 📈
- Use clear, compelling language that drives readers to click the buy button 🎯
- Keep your product descriptions punchy, benefit-driven, and engaging ⚡
- Optimize your visual sales funnel by organizing your layouts perfectly 🛠️
- Watch your conversion rates climb by delivering beautiful product documentation 🚀
- Experience the power of professional design inside your daily sales operations ✨
FAQs:
1: What is the fastest way to add an image caption in Google Docs?
A: The fastest workaround is using the Insert > Table method to create a 1×2 grid. Place your image in the top cell and type your text in the bottom cell. Then, change the table border width to 0pt to make the grid invisible, leaving a perfectly aligned layout.
2: Why do my image captions keep separating from photos in Google Docs?
A: This separation happens because the image and text are treated as separate elements. To lock them together permanently, use the Insert > Drawing > New tool to combine your graphic asset and text box inside a single canvas before saving it to your document.
3: How do I format image captions in APA style inside Google Docs?
A: For APA formatting, place your text directly below the image. Label it sequentially starting with Figure 1. in italics, followed by a clear, double-spaced title or brief description in standard sentence case font.
4: Can I add hyperlinks to image captions in Google Docs?
A: Yes, you can add hyperlinks easily. Highlight the text inside your caption box or invisible table, click the Insert Link icon (or press Ctrl + K), and paste your target URL to make the description fully interactive for readers.
5: Will captions formatted in Google Docs look correct when exported to PDF?
A: Yes, if you use the Drawing Tool or Invisible Table workarounds, your image alignments and descriptions will remain perfectly stable and locked together when you download or export the file as a PDF document.
6: How do I add alt text to an image for SEO and accessibility?
A: Right-click on your image and select Alt text from the context menu. Enter a descriptive title and a detailed description of the graphic content to help screen readers and search engine crawlers index your document properly.
Conclusion:
image caption google docs Mastering document design transforms standard files into polished, publishing-ready assets.
By utilizing smart workarounds like the Drawing Tool and invisible tables, you eliminate formatting glitches and keep your visuals perfectly synced with your text.
Great documentation relies on clean organization and clear visual hierarchies, so choose the layout method that best fits your workflow today.
Stop settling for messy shifts give your content the professional edge it truly deserves,

Charlotte Young is a creative content writer and digital storyteller who specializes in crafting engaging captions that bring social media posts to life. With a deep understanding of trends, emotions, and audience engagement, she creates powerful caption ideas for Instagram, TikTok, and modern content platforms.